Workstation


I moved all my scripts to Gumroad!
s – set key to selected channel in channelbox
$selectedAttrs = `channelBox -q -sma mainChannelBox`;

for( $attr in $selectedAttrs ) {

setKeyframe -at $attr;

}
shift i – toggle isolate selection
$currentPanel = `getPanel -wf`;
$state = `isolateSelect -q -state $currentPanel`;
$state = ($state == 0 ? "1" : "0");
enableIsolateSelect $currentPanel $state;
alt d – duplicate with input connections
duplicate -ic;
One imported snippet of code that I always have in the marking menu with the other cameras. It allows you to swap to the camera named ‘shotCam’.
lookThroughModelPanel shotCam `getPanel -wf`;
Annoyed at Maya not being able to load a friggin plugin? Add this to a file called userSetup.mel.
if(!`pluginInfo -q -l -n vrayformaya`) loadPlugin "vrayformaya";
Reset the locked axis after hitting “w”, “e” or “r” (shortcuts for move, rotate and scale). Add these to the corresponding press hotkeys:
buildTranslateMM;

buildRotateMM;

buildScaleMM;
Add these to the release hotkeys:
destroySTRSMarkingMenu MoveTool;\ndR_setActiveTransformAxis 3;

destroySTRSMarkingMenu RotateTool;\ndR_setActiveTransformAxis 3;

destroySTRSMarkingMenu ScaleTool;\ndR_setActiveTransformAxis 3;
During my time at Gnomon I had a very hard time to figure out what I needed to do to be able to stay in the US after my student visa runs out. In this article I will talk about what you can do as a student to prepare for the work life, and what can help you to get a working visa. Don’t get too excited though. It is a very tedious process and I myself have not yet gotten my working visa but hopefully this will give you some guidance that I wish I had. The following is written from my perspective and the advice and the way I talk about is specific to my situation. Every person is different and has their own story, so always keep an eye out for other opportunities. Also since it’s me who’s writing this article most of the information is probably made up and completely wrong. And I apologize if any of this sounds patronizing to you. I just tried to put down some information and hope it helps someone.
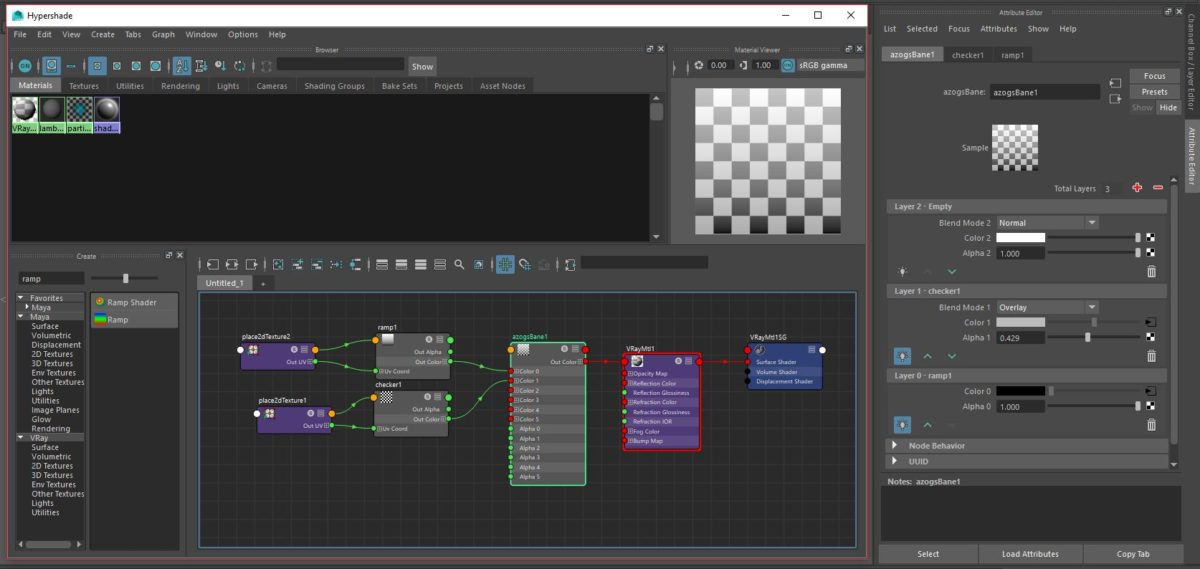
Over the last few weeks I’ve been writing my own version of a layered texture node for Maya and VRay. I’ve always missed the overlay blendmodes and the interface drove me insane.
So here it is, a layered texture node that works with Maya and Vray:
Download Azog’s Bane v1.0
Apparently this only works with Maya 2016, feel free to get in touch with me to get the source files if you want to compile this yourself or work off of it.
A little bit about the process:
First up I looked into creating plugins for Maya. There are two different types of Maya plugins, command plugins and dependency graph plugins. I first wrote the node in Python and everything seemed to work fine until I plugged it into a VRay shader. That’s when I realized that you also have to write the VRay counter part of the plugin so VRay can interpret the plugin on render time. The documentation for those plugins can be found here: C:\Program Files\Chaos Group\V-Ray\Maya 2016 for x64\docs. That meant I had to learn the basics of C++ which was ok since there are tons of example plugins. Unfortunately VRay did not bring any support for compound attributes which forced me to spell out the individual layer attributes (color0, color1, etc.) instead of having a dynamic compound array (layer[0].color, layer[1].color, etc.). I hope they bring that support soon. Then I realized that my Maya plugin only worked with the software renderer and I figured out that you have to write a hardware shader override to have it work in the Viewport 2.0 and Harware 2.0 render engine which is used to display the Material Viewer.
This is done in the xml files. About that time I also rewrote the plugin in C++ to hopefully improve the performance. The azogsBane_parameters text file is then used to tell vray how to interpret the maya plugin.
Unfortunately there are some bugs that I didn’t get around to fix yet:
1. The VRay preview crashes as soon as you resize the window.
2. The Color and Luminosity blend mode do not work.
3. Moving layers up and down with some of them connected and some not, can cause the colors to be reset.
If you have and comments or questions, please let me know.
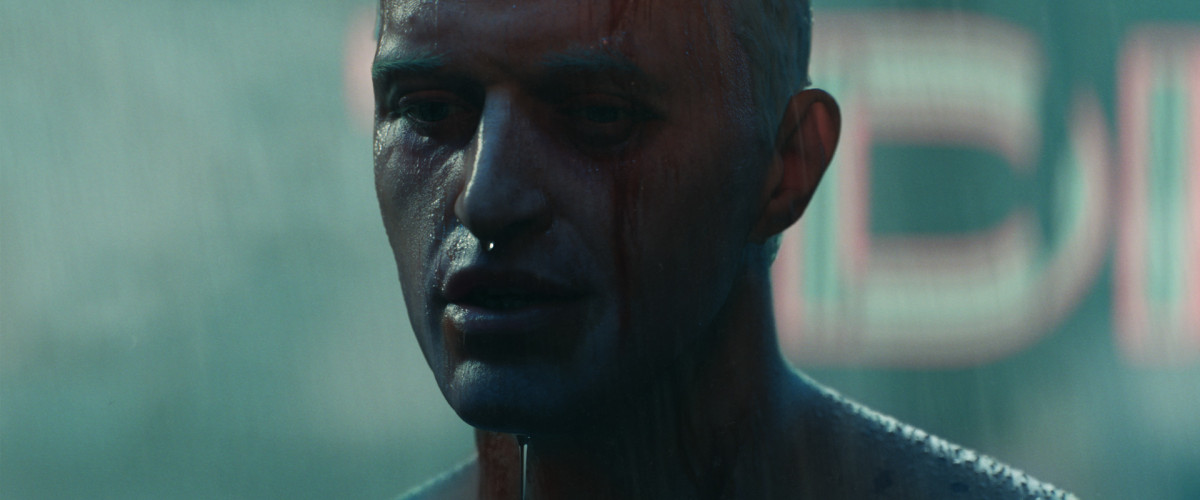
This is a shot I recreated from the movie Blade Runner. It shows Roy Batty (Rutger Hauer) during his famous tears in rain monologue.
I sculpted the likeness in ZBrush and used Mari and scan data from texturing.xyz to texture the head. I then did all the look development, lighting and rendering in Maya.
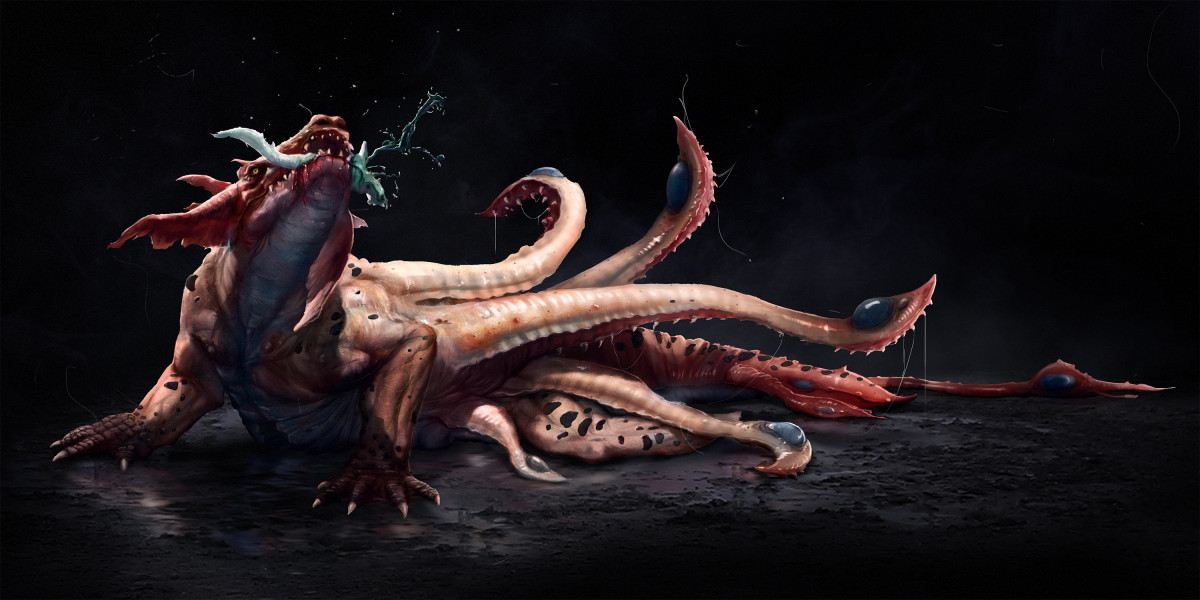
The Makara is a sea-creature in Hindu culture. It is generally depicted as half land animal in the front and half aquatic in the back. When the Makara feels endangered it pushes it’s lower back upwards and fans out its tentacles to show the predator that it is ready to attack. The blue dots on the tentacles warn other creatures about the threat of envenomation.
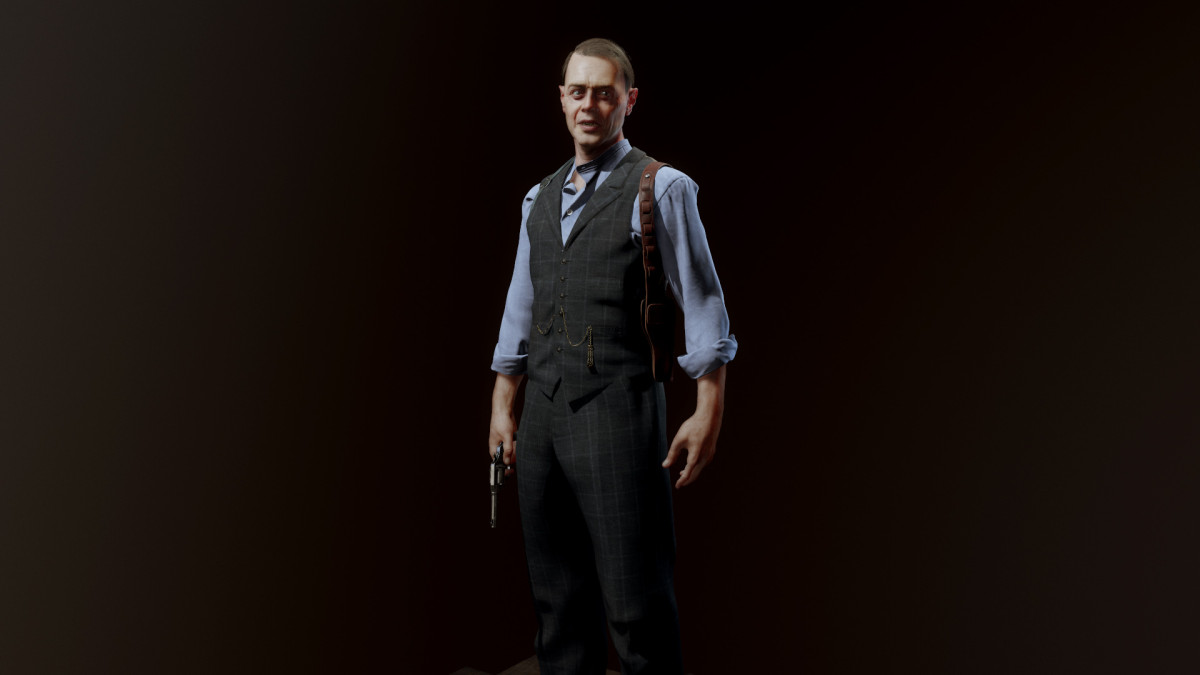
Enoch Malachi “Nucky” Thompson is a character from the show Boardwalk Empire played by Steve Buscemi. For this game character I sculpted pretty much everything in ZBrush and then stuck it in Marmoset Toolbag 2 for real-time rendering. The likeness of Steve’s face was a huge challenge and I still feel like I’m stuck in some sort of an uncanny valley. Overall a fun project though I really enjoyed the process of recreating an existing person and trying to get as close as possible.
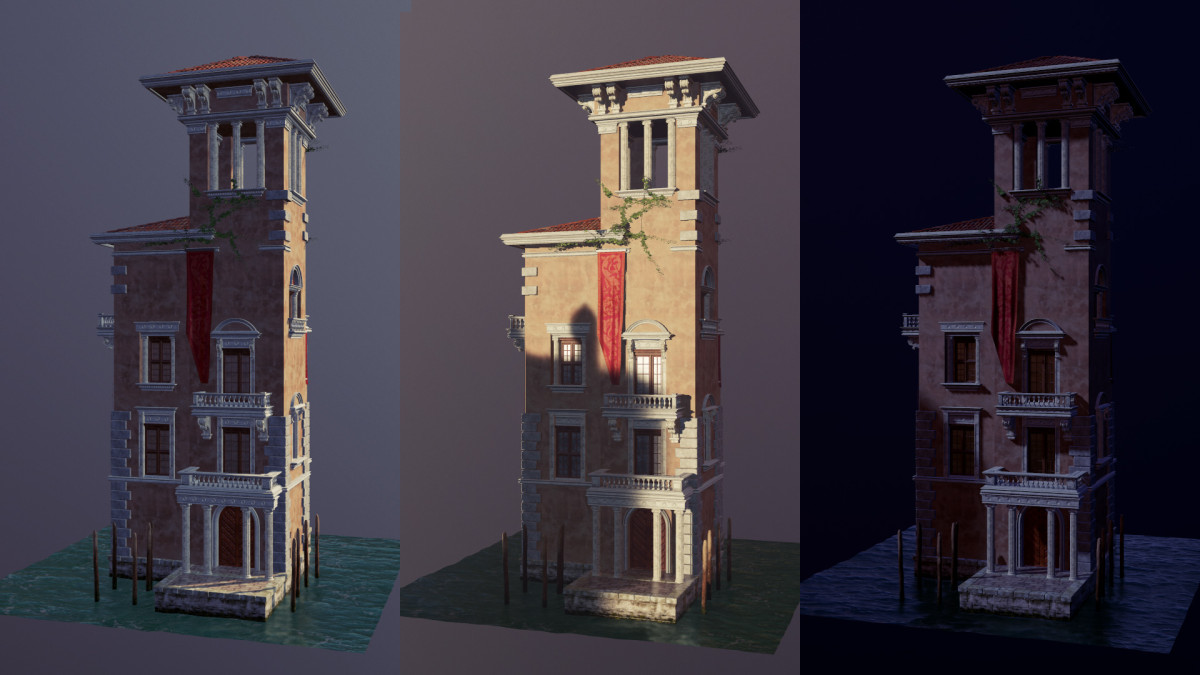
This building was done for Environment Creation for Games with Nate Stephens. He taught us so much about asset creation and modular environments for games. Initially I started of with a concept from Titus Lunter and ended up with a palace out of Venice.
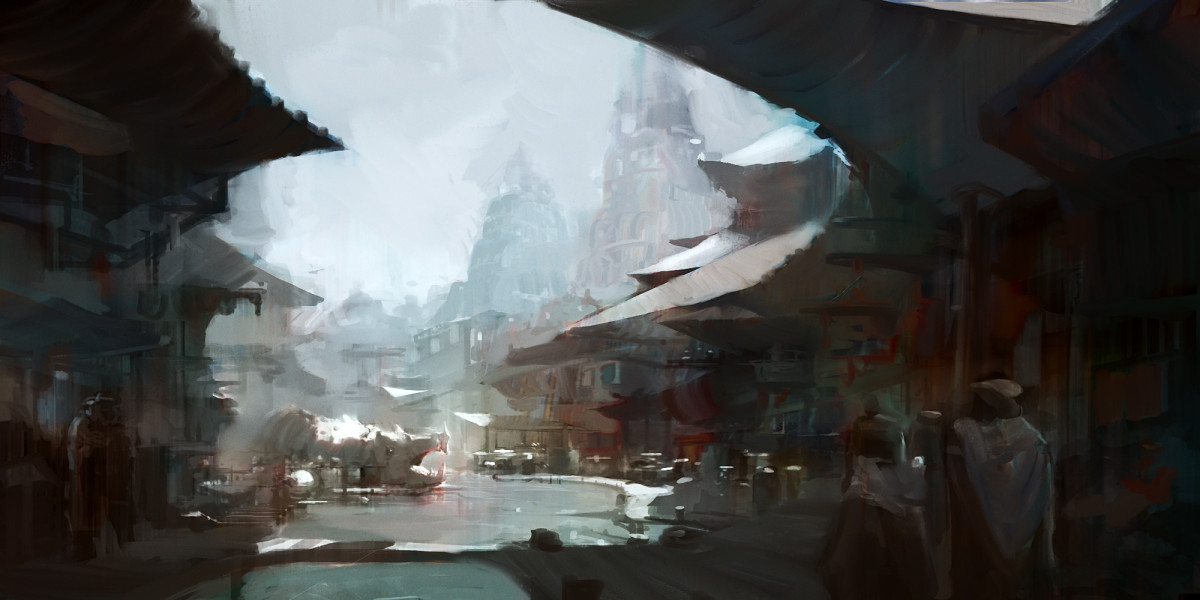
The following concept pieces were done for an environment design class here at Gnomon. From the third week on we worked on our IP that we could chose. I decided to imagine a world where Alexander the Great discovered new cultures with weird creatures. It must have been so interesting to see new animals such as elephants, that I can’t help but think of what discovering new cultures feels like.
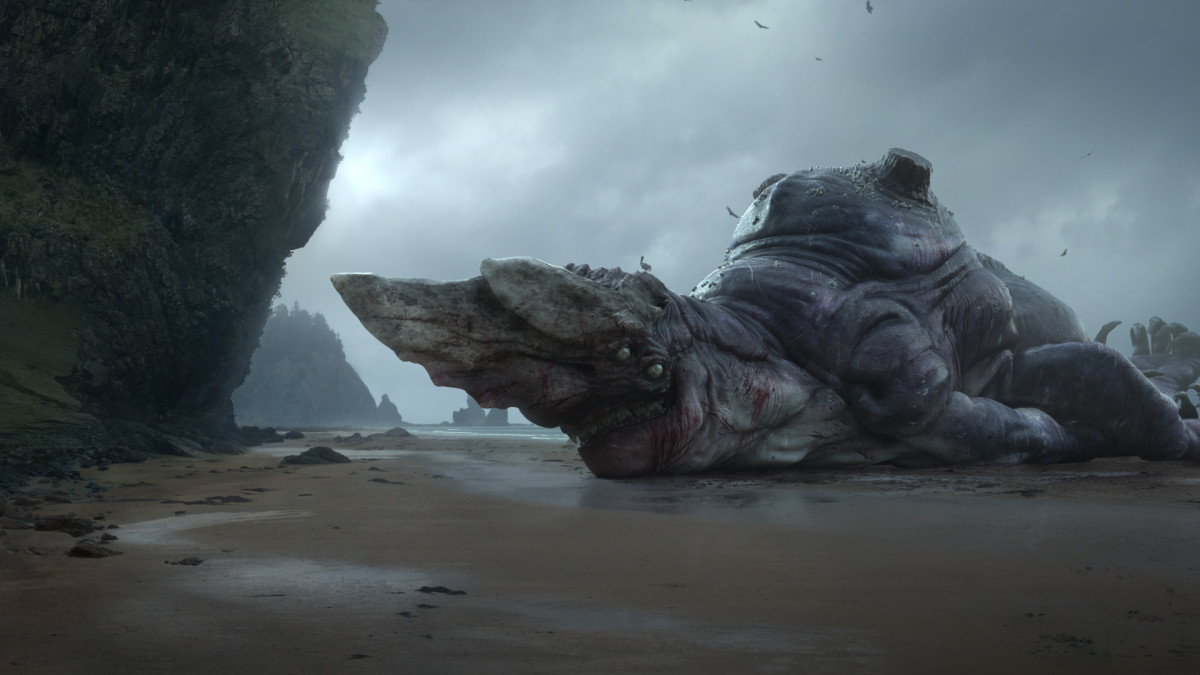
This term we had two classes with Miguel Ortega, who taught us so much about creature texturing and shading and how to create a complete shot. Based on a concept from Carlos Huante I sculpted a creature laying on the ground. Parallel to going through many iterations of color for its skin I worked on a matte painting, which’s idea for that came from a really cool digital painting by Tuomas Korpi.
It was really tough to handle all the data of 13 UV patches at school but the final render actually didn’t take that long since it didn’t have to calculate any environment.